Baby Bonnets have made a comeback in a big way lately & I for one think that's wonderful. So today I'm going to show you how to sew, quite possibly, the easiest bonnet you'll ever create. This project is perfect for beginners and super quick, but most importantly.... it's super cute!!!!
The instructions below will fit size 12 to 24 months.
What you'll need...

2 x Fat Quarters (22" x 18")of Fabric
Thread
2 x 35 Inch lengths of Ribbon
Sewing Machine
Scissors or Rotary Cutter & Self Healing Mat
Pins
Bodkin or Safety pin
A4 size sheet of paper
Pen
Measuring Tape & or Ruler
Let's Get Started...

Step 1. You'll need to create a template. Don't worry... it's easy peasy! Take an A4 size sheet of paper and lay in a landscape position (see above). Mark out 11 inches along the top edge & 8 inches along the bottom edge.

Step 2. Draw a nice curved line between these two markings.

Step 3. Cut along the curved line that you just created. Now you'll have a handy little bonnet template. The longest edge will be your fold line.

Step 4. Cut 2 panels using your template, remembering that you will need to fold your fabric in half before tracing out the template. If you've done it correctly, you'll have two pieces of fabric that look like the ones above.

Step 5. With the 2 panels, right sides together, pin and sew along the curved edge (brim), using a 1/2 inch seam allowance. Starting & ending approximately 1/2 an inch from the edge of the fabric, as shown by the dots in the image above.

Step 6. Sew a straight stitch down each side using a 1/2 inch seam allowance. Start each side seam 1/2 an inch from the start/end of the seam that you have sewn for the brim & end the side seams 1 inch from the bottom edge.
I've given you a visual image of this step above and below with the dots.


Step 7. Sew along the bottom edge, again with a 1/2 inch seam allowance, in 2 parts so that you leave a gap in the centre to turn the fabric right way out.

Step 8. Turn right way out.

Step 9. Push out corners and edges and iron.

Step 10. Using a bodkin, or something else long and thin, push into all 4 small gaps that have been created, to make it easier to insert the ribbon a little later on.

Step 11. Sew straight lines across, as shown in the image above. These lines form the casing for the ribbon to go through. Both casings should be approximately 1/2 an inch wide.

Tip - When sewing the lines, it helps to use your sewing foot as a guide.

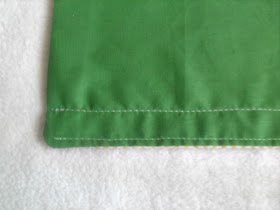
Note... Sew the bottom line fairly close to the edge of the fabric as you would when top stitching. This will close off that turning gap that we created earlier.

Step 12. Take your bodkin and thread one piece of ribbon through it's hole, ready to insert into the casings. If you don't have a bodkin, you can easily thread the ribbon through using a safety instead.

Step 13. Insert the first piece of ribbon into the casing, as per the above and following 2 images. Then repeat with the bottom casing.


Now you should have something that looks like the image above.

Step 14. Fold the bonnet in half (as shown above) & mark where the centre is at both casing sections. Also making sure that your ribbons are at even lengths.

Step 15. Sew a small straight line across the centre of both casing sections to secure the ribbons in place.

Step 16. Bunch the fabric up along the bottom casing on both sides as shown above.

Step 17. Tie a nice little bow with the ribbon in the back & you'll have yourself a beautiful little bonnet.

This bonnet is such a great quick project. I can whip one up in under half an hour! And let's face it, if you're a mum of young ones, some days, that's all the spare time we get!
No comments:
Post a Comment