SEARCH FOR MORE HERE

Showing posts with label How to Build. Show all posts

Sunday, January 12, 2014

How to Build a Quick and Easy Sawhorse


How to Build a Quick and Easy Sawhorse
by BRETT
A few months ago, Craftsman  flew me up to Chicago to visit their Craftsman Experience shop for a blogger summit. (If you’re ever in Chicago, I definitely recommend stopping by the Craftsman Experience and checking it out. It’s free and open to the public.) I spent the day playing with tools and learning how to build various projects under the tutelage of several DIY bloggers. One project that I really enjoyed and found pretty dang useful was from Timothy Dahl, owner of the DIY blog Charles and Hudson.
Timothy showed us how to make a simple, yet sturdy sawhorse that even a handyman noob like myself could build without screwing up too much.

Why Do I Want to Build a Sawhorse?

Good question. Sawhorses come in handy in a variety of situations. The first and most obvious situation where a sawhorse is useful is when you need to saw something. Duh. A sawhorse gives the board you’re sawing the support and elevation you need to make a clean cut.
A pair of sawhorses can also be used to make a makeshift work table or scaffold. Just use the two sawhorses as the legs, and place a sheet of plywood over it. When I worked as a painter one summer back in high school, my boss would use a pair of sawhorses and an old door he found on the side of the road to make his worktable. Makeshift tables from sawhorses particularly come in handy when you’re setting up for a garage sale.
Let’s see. Other reasons you should build a sawhorse… How about for a makeshift seesaw? Or what about using it as the fulcrum for a home defense catapult? Just spitballin’ here.
And while you can certainly buy ready-made sawhorses at your local big box hardware store, you miss out on the fun and satisfaction of building a piece of equipment that will serve you for years to come.

Materials

Here are the materials Tim recommends for his sawhorses. It’s enough to make a pair.
  • Six 32½-inch 2x4s (for the I-beams)
  • Eight 30-inch 2x4s (for the legs)
  • Twelve 3-inch wood screws
  • Thirty-two 16D galvanized nails

How to Build a Sawhorse

Building a sawhorse is super easy. It makes for a great starter project for the man who has never really worked with tools, but wants to become handier around the home.
Note: This is one way to build a sawhorse. I know there are plenty of other ways to do it. This plan is great for everyday use in a typical suburban garage. If you plan on using your sawhorses for heavy work, you might try another design.
1. Measure and Cut Your Timber
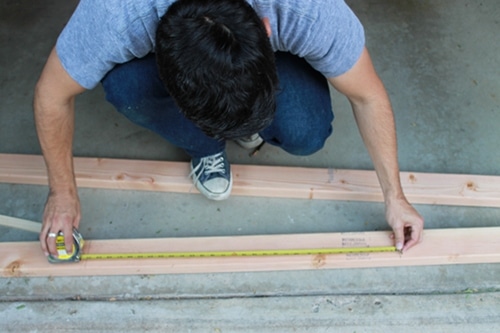
The 2x4s I bought came in lengths of sixteen feet, so I had to cut them down to the needed sizes. Here I am measuring and cutting 32½-inch pieces for the I-beams and 30-inch pieces for the legs. Remember to measure twice and cut once!
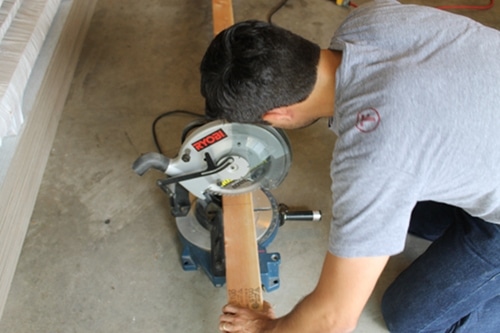
Here I am using a portable compound miter saw to cut the timber. You can use a hand-held circular saw or even an old-school handsaw.
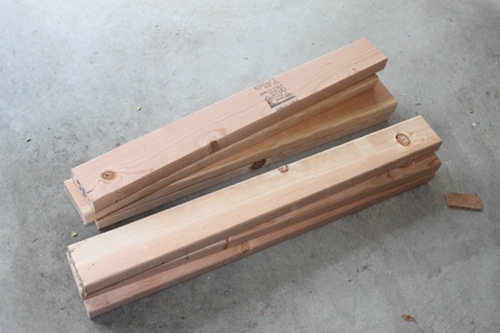
Ready to be turned into a sawhorse
2. Build I-Beams
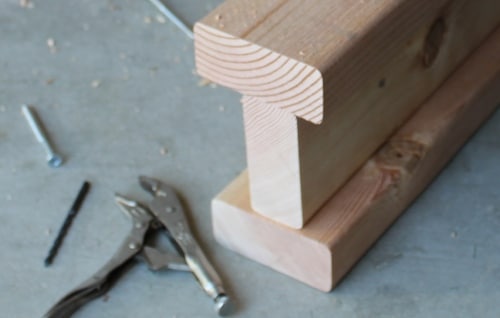
Take three of your 32½-inch 2x4s and screw them together in an "I" formation.
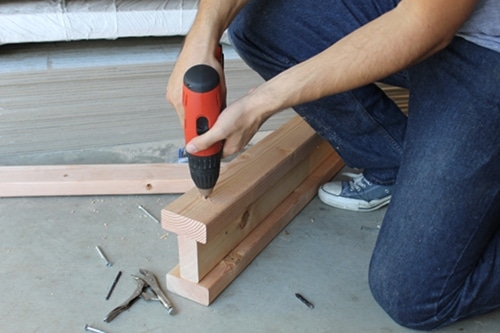
I found it helpful to drill a pilot hole before driving the screws in.
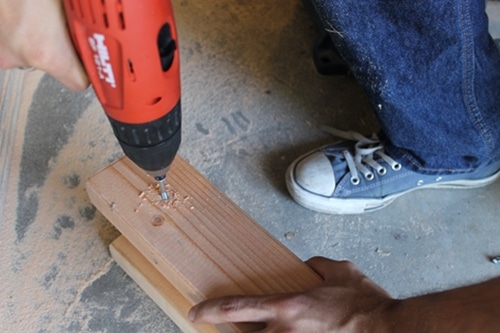
Drive three wood screws right down the middle on top and bottom of the I-beam. Place two of the screws near each end and drive the other one right in the middle of the I-beam.
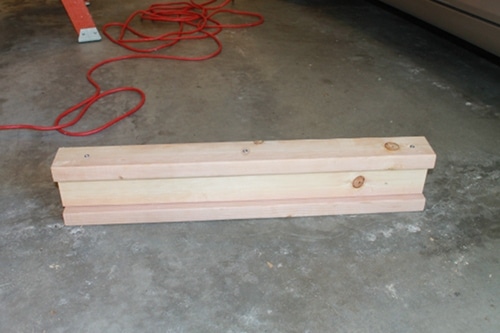
Finished I-Beam
3. Nail the Legs to I-Beam
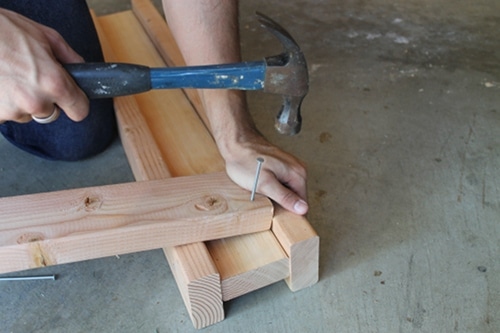
Butt the end of the 30" 2x4s into the top of the I-beam like so. Hammer two nails at the top of the leg so that they go into the middle I-beam piece.
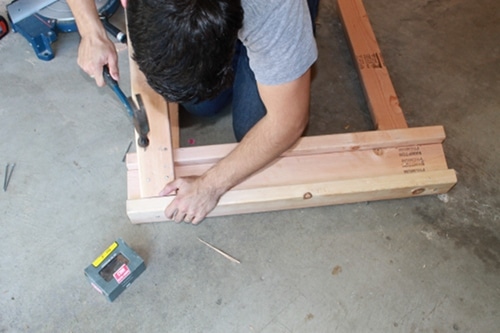
Nail two more nails into your leg so that they go through the bottom I-beam piece.
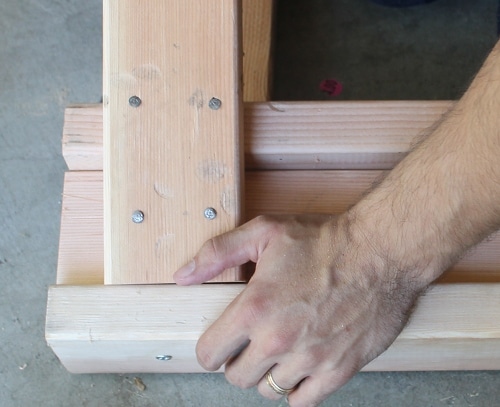
If you've done things correctly, you should form a box pattern with your nails. Notice my hammer dings in the wood. I need to practice.
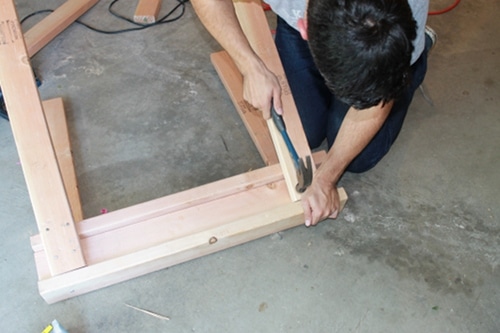
Repeat for each leg.

Completed Sawhorse
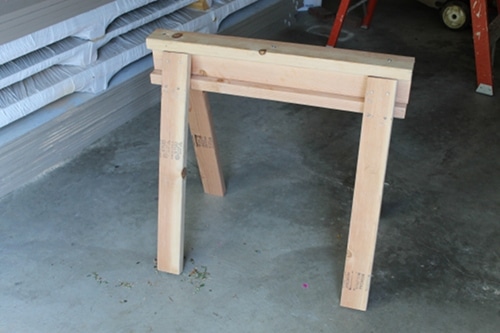

My finished sawhorse. Rinse, wash, and repeat to make your second sawhorse for a pair. To store these bad boys, just stack 'em.

Friday, November 23, 2012

How to Build a Mouse Trap Car


How to Build a Mouse Trap Car

Introduction

Toy cars can be a lot of fun to build, but most of them involve the use of some hard-to-come-by materials and tools that can be difficult to use. Not so for a mouse trap car though, as you can make one in as little time as a couple of hours. They are perfect for racers, as they are self-powered. Moreover, most mouse trap cars only cost a few dollars to build (as long as you have the necessary tools around your garage). So, if you want to build your own toy car, but have no idea where to begin, the mouse trap car may be perfect for you.

The Power behind the Design

mouse trap carMouse trap cars are so much fun because they come with their own power supply built right in – the mouse trap itself. Specifically the spring on the trap. By using a string to harness the power of the spring, you can easily drive the wheels of your mouse trap car. Almost all mouse trap cars use the same principal to operate, but the car described below was chosen for this guide because it is very easy to build. After making this car, you can try out your own designs using the same propulsion mechanisms outlined here. You can create almost any design you can imagine with a simple mouse trap and a few wheels.

Materials

You need the following materials to build your mouse trap car:
  • mouse trap (of course).
  • Two metal rods that are each 4 mm in diameter and 15 mm longer in length than the width of the mouse trap you are using for the car. These rods will act as the axles for the car.
  • Four eyehole screws that are barely large enough to put the metal rods through.
  • Plywood or any other type of thinly cut wood for the wheels.
  • Two rubber bands.
  • String.
  • Washers with an inner diameter of 4 mm.

Tools

While the materials for a mouse trap car are easy to come by, you may not have all of the a tools necessary. To build the car, you will need the following tools:
  • Drill with a 3.7 mm drill bit.
  • Jigsaw (a coping saw will also work).
  • Compass to make a template for the wheels.
  • Hammer.
  • Vice.
  • Hacksaw.
  • Wood file.
  • Wood glue or super glue.
  • Epoxy (the type of glue that comes in two parts which you mix together).
  • Plies.
  • A small Jeweler’s File.

Building The Body

To begin construction, you need to use your pliers to pull the wire that holds the mouse trap open out of the trap. Also remove the bait holder, as this part is not necessary. Keep the wire catch to the side though, you will use it later. Also pull out any staples that may have held the previously removed parts in place. When everything is removed, take the eye hooks and screw them into one end of the mouse trap approximately 8 mm from each edge. If the wood begins to split as you screw the eye screw in, simply drill a small hole first.

Wheel and Axle Assembly

You can make the wheels by using the compass to create four 75 mm circles on the plywood. The wheels can be larger or smaller if you choose, but 75 mm is a good size for relatively long distance runs. When the wheels have been sketched, cut along your freshly drawn line with a jigsaw and file them down along the edges so that they are nice and smooth. Then take the rods and place them in a vice. Cut them to exactly equal length and file the ends so that they are nice and smooth as well. Cut about half way through one of the rods with the hacksaw and use the jeweler’s file to widen the slot enough to allow the wire catch that was removed from the trap in an earlier step to fit into the groove snugly. Cut a 7 mm piece of the wire catch and file down the ends. Using the epoxy, glue the piece of wire into the slot on the axle so that the wire overhangs only on one side. Let the epoxy dry overnight.

Mounting the Wheels

When the glue is dry, place the axle with the wire at the rear of the mouse trap (where the jaws of the trap rest when the trap is set). Place the other axle through its respective eye holes screws. Add washers to the end of the axles so that the axles will not slide out. Drill a hole into the center of each of the wheels with your 3.7 mm drill bit and then slide the wheels onto each of the rods.

Mounting the Engine

Now for the actual power behind the mouse trap car. Take your string and tie it to the middle of the jaws of the mouse trap (the part which snaps down on the mouse). Tie a loop in the other end so that the loop is located exactly at the rear axle. Cut off any loose ends. Take the two rubber bands and place one around each of the rear wheels for extra traction. You can glue the rubber bands into place so they will not slide off.

Powering up the Car

To use the mouse trap car, simply raise the jaws of the trap slightly and take the looped end of the string and place in over the wire that was attached to the rear axle. Reverse the car to allow the string to wind around the axle and pull open the jaws of the trap. Release the car on the ground and it will speed away.
A mouse or two at home can be easily caught with a well-crafted mouse trap, but if you’ve swarms of them running around your feet, maybe you should try these techniques how to get rid of mice. Of course, you also want to get rid of those nasty gnats buzzing around your face, so check out these tricks on getting rid of gnats, to drive them away from your home as well.

Wednesday, November 21, 2012

How to Build a Catapult


How to Build a Catapult

Things You Will Need to Build a Catapult

If you are planning to construct your very own catapult, you initially need the following materials:
  • 3 pieces of sticks or wood approximately 10-12 inches (you can use longer ones if you desire to make a bigger one)
  • 8 pieces of sticks or wood approximately 5-6 inches (Note: just make sure that these pieces of wood are half the length of the 3 longer pieces.) 2 of these sticks ought to be cut at the edge at an angle creating a roof like shape (that’s about 45 degrees)
  • Pieces of screw or nails (or even thumbtacks)
  • A bottle of strong glue or glue gun with glue sticks
  • 1 tough stretchable piece of rubber (much like the ones that are used for slingshots)
  • 2 hooks of about a centimeter in size (the ones that look like question marks)
  • 1 slim metal pole (this one should be of the same length as the smaller pieces of wood)
  • a small container or basket (which will serve as the container of the projectile you want to launch)

Making the Catapult

If you have all of the stuff mentioned above, you can now start assembling the pieces of sticks or wood by following these simple guidelines:
catapultStart assembling the frame of the catapult.

The Two Sides of the Catapult

Place one of the longer pieces on its side
At this point, screw and glue (you can choose between screws, nails or thumbtacks) one of the sticks with a 45 degree cut at the end of the longer stick. The 45 degree angle cut should be placed in line with the first long stick. This should look triangular, forming a 45 degree angle towards the longer stick
Now, connect one of the uncut sticks to the long stick and the 45-degree-cut stick. The end of this stick should be placed squarely with the long stick so that it can stand. This would now form some thing like a letter “A” on its side.
Next, make another one like this using the same kinds of sticks stated above.
These would be the two sides of the catapult.

The Frame of the Catapult

Next, connect these two sides. (Note: the 45-degree-cut sticks should be placed in the inside). You may begin this by screwing and gluing a piece of the shorter sticks on each of the ends of the long sticks, thus connecting them. You can secure and fasten it by using glue, screws, nails or thumbtacks. Then connect the two 45-degree-cut sticks by placing and fastening a piece of wood on top of them. Then, connect and fasten the two pieces of sticks which are upright by also screwing and gluing the last piece of the shorter sticks to both sticks.
Now, you are finished with making the frame of your catapult.

Making the Launcher of the Catapult

This time, you are ready to make the launcher of your catapult.
Start by making a hole on the end of the last piece of the long sticks. This hole should be about 3 inches from the end (same measurement as to the distance of the two upright sticks from where they are attached to the closer or nearer end of the base sticks). The hole should be a tad bigger than the metal pole.
Now, fasten one of the hooks to the other end of this long stick (about 2 inches from the end of this stick).
Afterwards, glue your container or basket to the end of the stick (right before the hook).
At this point, you should attach the launcher of the catapult to its frame. To do this, you just need to insert the metal pole into the hole you made before the launcher. Next, connect the metal pole to the two upright sticks (you can wriggle it a bit into the upright stick so it attaches itself better or taping it would also help so that it will not wobble).
Finally, just attach another hooks on the base (to the opposite of the launcher), and it should be aligned to the other hook.

Launching an Object using your Catapult

To launch something using your catapult, just tie the rubber to the base hook, stretch it, attach it to the other hook, and let go!

Saturday, November 17, 2012

How to Build a Fountain


How to Build a Fountain

How to Build a Fountain
There are several choices when it comes to constructing fountains. From small to large, all fountains have the same purpose and need basically the same materials. To create a fountain you will need: a tubing, a water pump, and a few basic tools. Fountains are fairly easy to build and do not require much skill.
As with many things you build, you will need to find a suitable location for the fountain. There needs to be a power source nearby to support the water pump. For a simple fountain, you will need two flower pots. The pots can be arranged in many ways but the most common is one tipping over on the lower pot to create a waterfall effect. The water pump will need to be placed in the reservoir pot and connected to a heavy material with twine or a rubber band. To create a custom filter for the pump, simply cover the pump with mesh, pantyhose will work fine.
Next you will need to connect the tubing with the water pump and have the tubing come through the reservoir and into some chicken wire. This wire will act as the reservoirs lid so that you can load any decorative stones to the top of the fountain. Cover up the water pump with flowers or any other materials you think would look good with the fountain.
Now you need to dig the second pots base. Have the tubing run through the pots drain hole and have it sealed with a type of rubber fill or putty. To cover the appearance of the tubing, pebbles can do the job, if placed correctly. Once all of the pots are set up, fill up your reservoir and make sure the pot has water in it before you turn on the water pump. Now all you have to do is make sure all of the rocks and pebbles are placed correctly so the fountain does not end up overflowing.

LinkWithin

Related Posts Plugin for WordPress, Blogger...

Infolinks